Get started – table of contents
Overview


5. Preview your frames
While rendering is progressing, you will be able to see your rendered frames and download them to inspect.
New rendering
Choose your 3D Software:
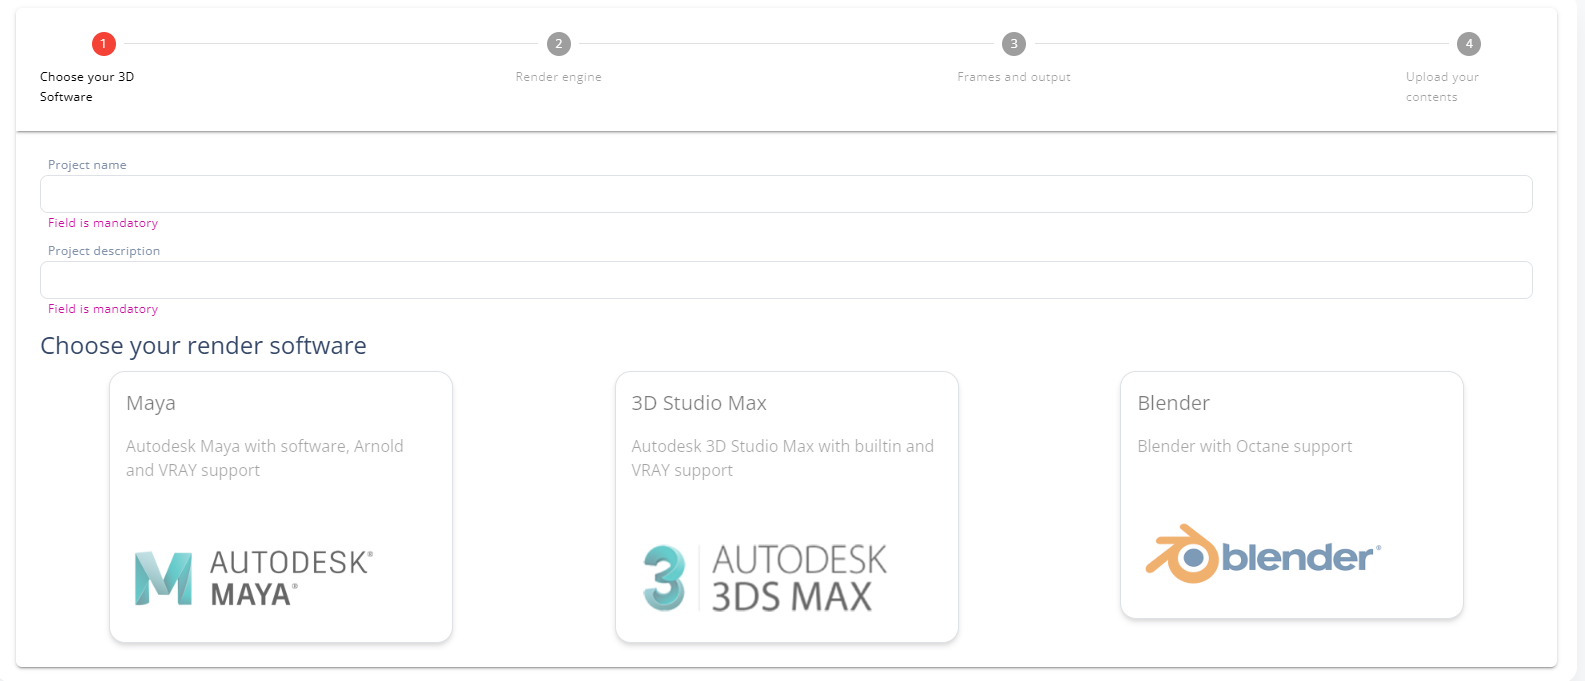
select your software from the available ones
Choose your 3D Rendering engine:
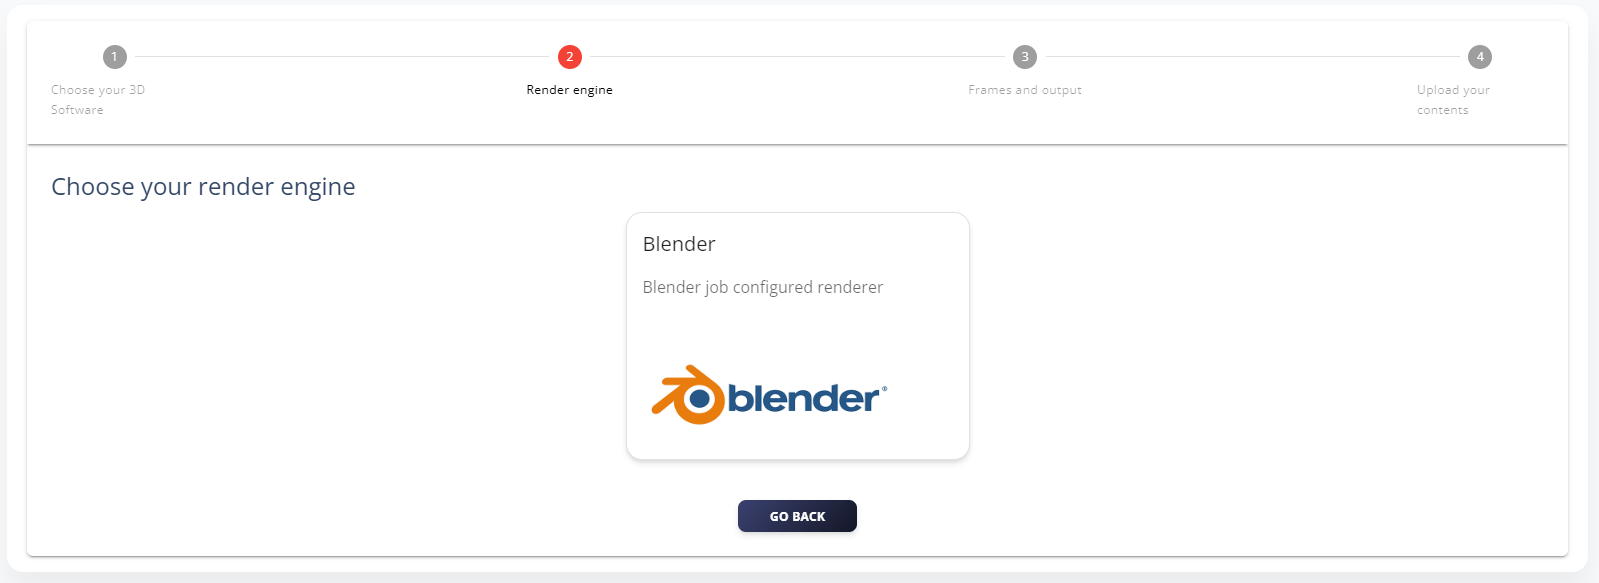
select your software from the available ones
Set your rendering:
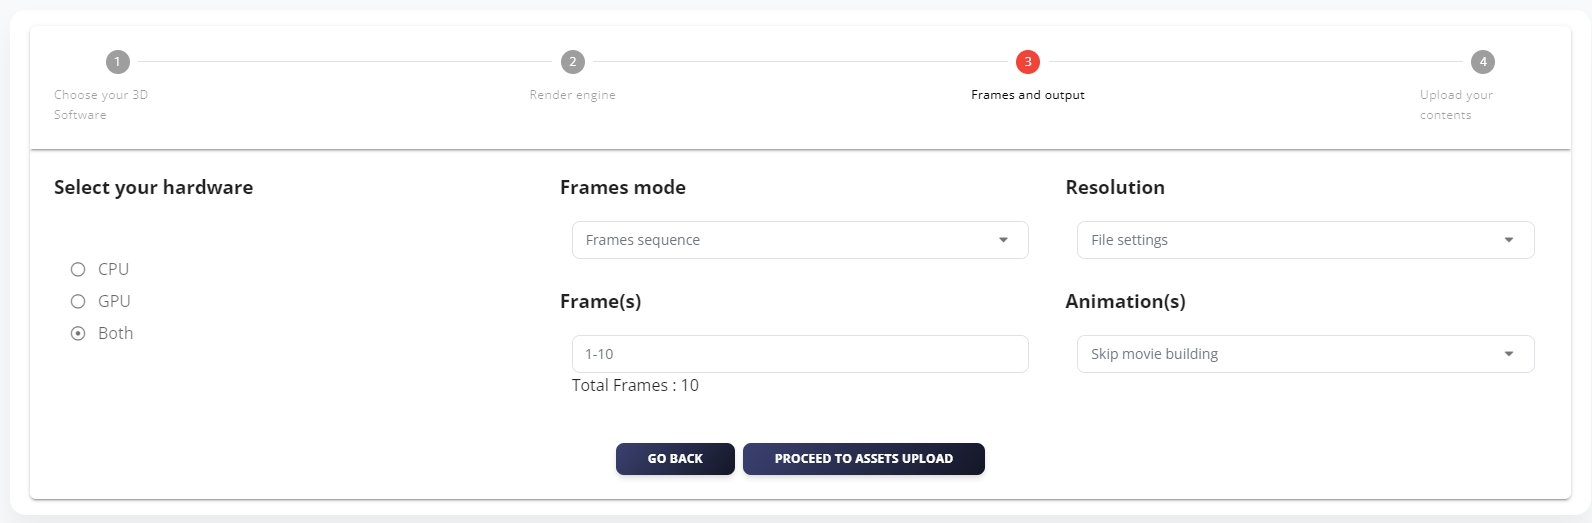
from this menu you can edit some mandatory information, other settings are directly inherited from your project file
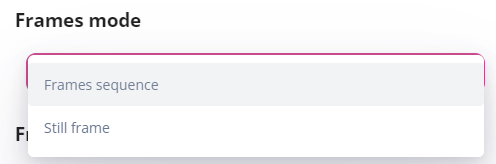
With this selector you can specify if you are going to render a single image or a sequence of images
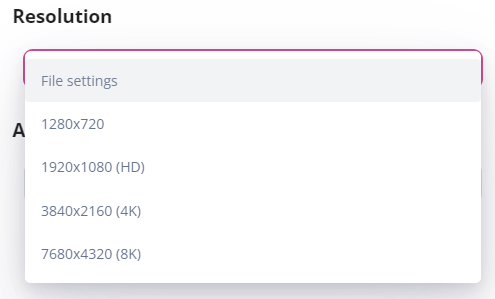
You can override the resolution by this selector.

This option gives the possibility to convert yor sequence in a movie .H264 / .MP4
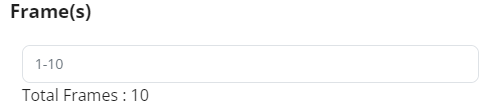
Finally set the frame range of your sequence that you need to render
Upload your project files:

After clicking in the file input bar you will be prompt to upload your assets, make sure they are all packed:
- Find all your assets like the software file and textures and put them under one directory (e.g. /user/myProject.blend | /user/assets/…).
- You may need to strip all paths (may vary for each software)
- If you are using windows: select all > right click > send to > compressed folder
- You are ready to upload your file
Project Details
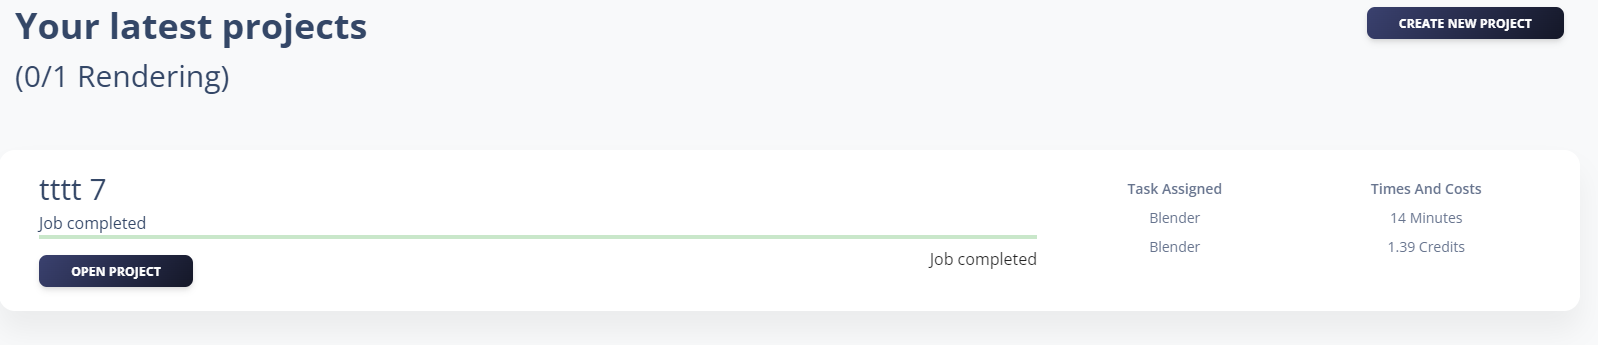
This look like when you create your first project and you see it to https://app.render-glitch.com/dashboard
Clicking “open project” brings you the targeted project.

In this section you can inspect the frames, download files and see how much time it required and the cost
account

in this section https://app.render-glitch.com/filemanager
You can delete unused files which are tracked, for optimized usage, in your personal account profile and speeds up rendering when you are submitting similar assets.

Here an example of a tracked file to a project with an example name and description.